Ensor via web client (all browsers)
General
Either you enter the hyperlink in your web browser: https://app.ensor.be/rdweb/webclient/
Or create a shortcut on your desktop.
- Right click on your desktop and choose “New” and then “Shortcut”
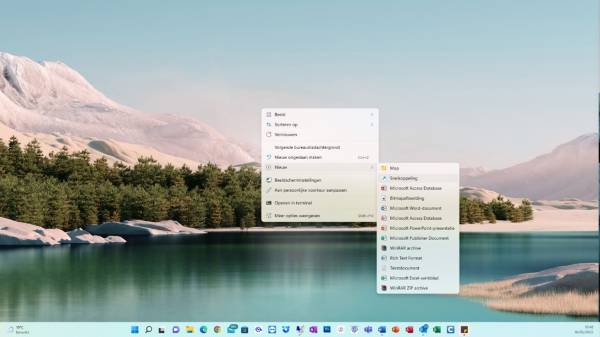
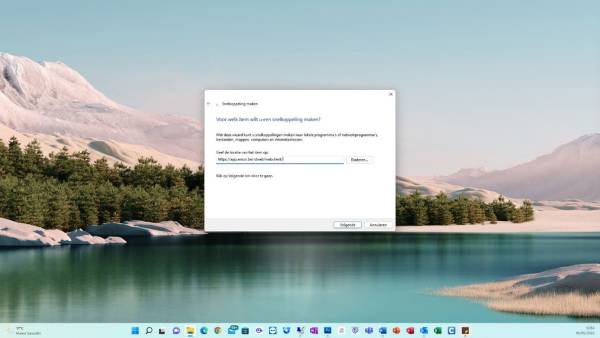
- On the pop-up screen “Create shortcut” enter the hyperlink to the web client in the input field “Enter the location of the item”: https://app.ensor.be/rdweb/webclient/
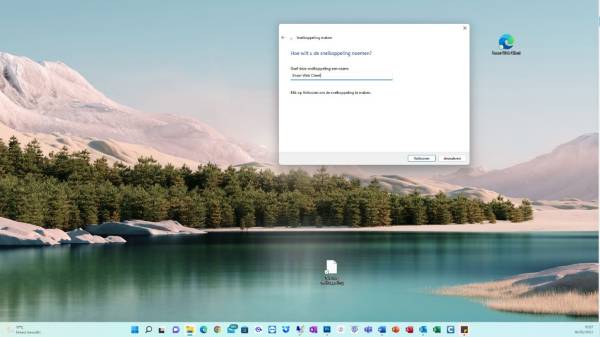
- On the next pop-up screen, enter “what would you like to name the shortcut” in the input field “Give this shortcut a name” eg “Ensor Web Client” and then click the “finish” button. Then a shortcut will appear.


Log in
Log in via Ensor Web client
If you click on the Ensor Web Client shortcut on your desktop or enter the hyperlink in your web browser, you will see the following screen Here you have to enter your “Ensor RDS Login” (the login you received from us that ends in …@ensor) and your “Ensor RDS password”

If you have an individual Ensor RDS login (to connect to the Ensor Client) and Ensor Login (to log into the client) and both have been linked by us, then you only need to enter the Ensor RDS login and password and you are automatically logged in to the client.
If you only have one Ensor login for your company for different people who have an individual Ensor RDS login, then both cannot be linked to each other and you still have to enter your Ensor login to log in to the Ensor client.
We can give individual logins if this is desired, then one step can be skipped
Select the Ensor Client
If you have entered your Ensor RDS login and password, you will get the following screen where you select the Ensor logo (in this example there is also an Ensor Test logo, but this is not available for the ensor users and you will not see it).

Once you have clicked on the Ensor logo, the connection with the client will be started.
But first a pop-up screen will emerge with Access conditions to the local resources. The box “File Transfer” has to be ticked because this is necessary to upload and download files. Click the button “allow” and the connection will start.


The Ensor Client screen in the Web Client
This screen looks slightly different than the classic RDS connection from the past via the website. Documents that you want to add, such as ship documents, the Anna template for the declaration of crew and Pax, etc., must also first be uploaded in the web client at a specific location before you can insert them in Ensor. For this I refer to the manual on the Ensor Wiki for uploading and downloading documents in the Ensor Web Client.

Ending the session
If you have made all declarations in Ensor and you want to close the session, you have to click on the logo of your account at the top right with your right mouse button and select the option “log off”. Then you will return to the login screen after a few seconds.

Navigation bar
At the top of the Web client you can see a navigation bar with several options:

- Upload: this is further explained below
- Unpin / Pin Navigation bar: When you choose 'unpin navigation bar', the navigation bar disappears. By clicking
 you can make it visible again and then pin it again by clicking on the pin.
 - Click to go to 'full screen' mode. click on
 to exit full screen mode.
 - Click this to change your settings (not really applicable)
- Click this to get more information about the Web client (note, this is general information and a general help function, not specific to Ensor)

Upload en Download
Upload
When you want to upload documents or images in the web client, they must first be uploaded in a personal and temporary folder within your profile:
- click on

- select the file you want to upload and click on “open”. You will be notified that your file has been uploaded to the Remote Desktop Virtual Drive
When you then e.g. want to add a file as an attachment:
- Select “Remote Desktop Virtual Drive on RDWebClient” or “Virtual Drive on Remote Desktop”
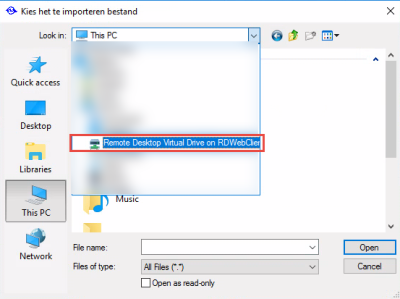

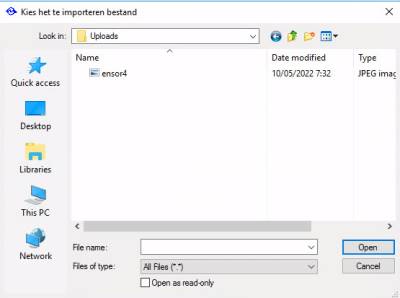
- Select the folder “Uploads”.
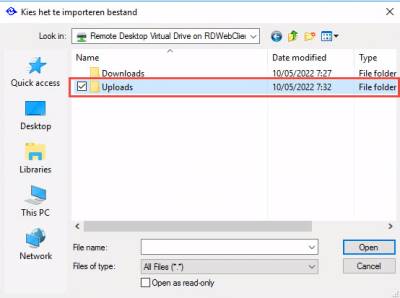
- In this folder you will find all the images and documents that you have uploaded. Select the file you want to upload.


Download
When you download a file you have to choose in which folder you want to place it. Choose here for “Remote Desktop Virtual Drive on RDWebClient” or “Virtual drive on remote desktop”, then folder “Downloads”. The document will be downloaded there, but will also open immediately on your PC, after which you can save the document locally

Shortcuts that no longer work as expected
| Sneltoets | Verwachte actie | Effectieve actie | Alternatief |
|---|---|---|---|
| Numeric '+' | Enter current date and time | Nothing happens | F11 (doesn’t allways work) |
| Ctrl+F4 | Close Panel | Full application shuts down | / |
| Ctrl+N | Add new record | If you are not working in full screen mode, a new browser screen will open | Work In full screen modus |
| Ctrl+Shift+N | Add Sequel | Open incognito window | / |
Remote help
The helpdesk can provide assistance via remote assistance. For this you will be asked to download Tauris Helpdesk applicatie.
After downloading, choose run. When starting the application, a partner ID will be displayed after a few seconds. You must communicate this to the helpdesk